 |
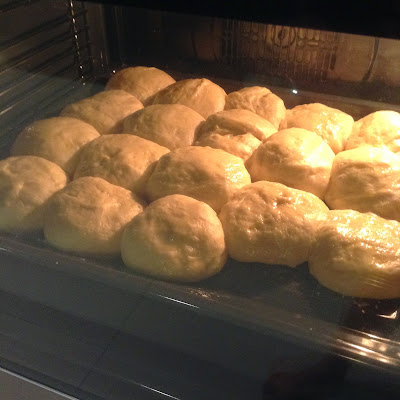
| Okay, first attempt, surface looks so ugly...lol... |
I had some leftover whipping cream that I need to finish, I was thinking of putting it in a butter cake, but then I decided against it after 2 failed attempts on Elvis Presley's favourite pound cake. Especially now that butter becomes increasingly expensive with the GST kicking in.
This also gives me the opportunity to use my k-Mix for dough kneading for the first time. I was super excited. The dough feels heavy to the mixer, I felt the heat from the mixer after about 10 minutes of mixing, and I set the mixing speed to 1, not sure if I should or can set the speed higher. I worried that the mixer can't take the heat from the long mixing. Ironically, that's what I bought the mixer for, for long duration usage for making bread. Haizz....I am full of contradiction, am I?
Anyway, I start and stop the mixer for a few times and I think I have run the mixer on the dough for maybe half an hour in total. I tested the dough, and looked for the elusive windows pane stage. The dough is not very smooth and I thought I have seen the windows pane when I stretched the dough.
After the baking the done, I find that the holes are bigger and looks not as fluffy (no doubt still very soft) compared to the Hokkaido Milk Loaf that I made with my Faber hand mixer. So, I'm uncertain whether I have looked at the right windows pane stage. I guess I need to start to get to know my mixer more on the bread mixing side. Or I don't know if it's because I proof the dough in a warm oven, not exactly at Malaysia's kind of room temperature. However there is no leftover yeast smell after baking which is good.
The taste is really good, but the buns' physical look need to be improved though (for the next round of baking). ^_^ ....as the buns from Her Frozen Wings - Japanese Cream Bread (which the recipe was adapted from) looks so nice....
Ingredients:
Sponge- 120gm bread flour
- 85gm boiling water
Dough
- 380gm bread flour
- 75gm sugar
- 6gm salt
- 8gm instant yeast
- 120gm cold milk
- 100gm whipping cream
- 1 cold egg
- 40gm butter
Methods:
- Prepare the sponge. Add boiling water from into the flour. Mix well to form a dough. Cover and let it cool. Refrigerate the sponge covered for at least 12 hours.
- Prepare the dough. Mix flour, sugar, salt and yeast until well blended.
- Add in milk, whipping cream and egg and knead to form a dough. Add in the sponge prepared earlier and knead until well blended.
- Lastly add in butter and knead until the windows pane stage is reached. (This would probably need another 30 minutes in medium low speed.)
- Cover and proof it for 40 minutes. Divide dough into 60g each, mould the dough round into the shape of a bun and rest it for 10 minutes.
- Place onto greased pan and proof it for another 50 minutes.
- Brush the bun surface with a lightly beaten egg.
- Bake at 190 degree C for 15 minutes.
 |
| Resting for the next 10 minutes |
 |
| Getting ready for the oven...still looks round... |
 |
| Baking in the oven...and they start to shrink a little...creating wrinkles on the surface... |
 |
| I suppose the windows pane stage was achieved from this texture. |
This post is linked to the event, Little Thumbs Up organised by Bake for Happy Kids and My Little Favourite DIY, and hosted by Diana from the Domestic Goddess Wannabe

These buns are no illusion - they are so delicious looking!!! Thank you for linking up!
ReplyDeleteThanks DomesticGoddessWannabe :D
DeleteHi Nitya,
ReplyDeleteI have tried this recipe before. I reckon that more kneading will improve the texture of these buns further... Despite all, I'm glad that you had a good time baking these :)
Zoe
Hi Zoe, thanks, will knead a bit longer next time, hope the surface will turn out smoother. :)
Delete